


Last updated: 03/09/2022
More than a million homes have already gone solar in the U.S., and many more homeowners are considering installing solar PV systems. If you’re in the market for a clean energy system like solar,, you probably want to know what actually happens during a solar panel installation or even how to install solar panels yourself. There are five main steps that need to happen between signing your contract and your home being powered by solar electricity. Most of that is behind the scenes. To show you what you can expect, we’ve outlined a simple five-step guide for the typical solar installation process.
Key takeaways
- The five main steps to installing a solar panel system include: an engineering site visit, permits and documentation, ordering equipment, solar panel installation, and approval and interconnection.
- Your installation will follow these five main steps whether you choose to finance your system with a lease, loan, or cash purchase.
- The actual installation of your system will generally take one to three days.
- Solar shoppers should use the EnergySage Marketplace to compare quotes from our network of pre-screened installers.
Solar panel installation: five main steps
There are five major steps to a solar installation that your chosen solar company will generally follow: the engineering site visit, finalizing permits and documentation, ordering necessary equipment, installing the solar panels, and lastly, approval and interconnection.
- Engineering site visit
- Permits and documentation
- Ordering equipment
- Solar panel installation
- Approval and interconnection
Before you start, try a home energy audit
It’s a good idea to make sure that your home is energy efficient regardless of whether you are interested in solar or just saving money on your electric bill. A home energy audit will uncover issues that make your home less efficient. By correcting those problem areas, you can reduce energy demands and make your home more energy efficient. Switching to energy-efficient lighting and appliances, as well as weatherizing your home, may be necessary.
It’s always good to start with a broad overview when learning how solar panel installations work, regardless of what type of installation it is. Start out by watching EnergySage’s time-lapse video, Solar Installation in Less Than a Minute (check it out below), which shows one of EnergySage’s pre-screened solar installers assemble a 6.7 kilowatt (kW) solar energy system on a home in Newton, Massachusetts. The happy homeowners now save $2,250 on their electricity bills every year thanks to their new solar panels and will break even on their investment in just five years.
How to install solar panels (step by step)
Installing solar panels doesn’t happen overnight – there’s a process for what needs to happen before your home is using solar electricity and potentially contributing to the electrical grid. Overall, from the day you sign your contract with your solar company, it will typically take between one and three months before your solar panels are grid-connected and producing energy for your home. We’ve outlined the five-step solar panel installation process below:
1. Engineering site visit: the first step to getting your solar system installed
After you sign your solar contract (whether it be a lease, loan, cash purchase or power purchase agreement), an engineer will come by your property to evaluate the electrical status of your home and ensure everything is compatible with your new PV system. This engineer will typically work directly for your installer, but could also be an independent provider contracted by your solar company. You can expect the engineering site visit to occur soon after signing with your installer.
During their visit, the engineer will evaluate the condition of your roof to ensure that it’s structurally sound. They will also look at your electrical panel – the grey box in your basement – to see if you’ll need to upgrade it. If you hear from an installer that they need to upgrade the electrical panel, that means that your new solar panels will require more amps of current, and the ampere capacity of your electrical box will need to increase.
There is a possibility that, if your system is too old, that it will need to be replaced or upgraded.
It should be noted that this engineer visit is different than a general site visit which is when an installer evaluates your property to consider system size, roof type, angle of roof, shading, etc. before any contract is signed. Additionally, though an engineer will typically come by, in some cases the installer can take photos of the property and conduct their own measurements of the roof and the engineer will be okay with signing off without doing his or her own visit.
2. Permits and documents: the logistical paperwork required for your solar panel installation
As with any big financial decision, installing solar panels involves a lot of paperwork. Luckily, most of this paperwork is dealt with by the installer – regardless, it’s always a good idea to know what’s going on behind the scenes of your solar installation. One of the main things you’ll be applying for will be state and federal solar incentives such as the federal ITC, local solar programs, clean energy financing initiatives like PACE, government rebates and solar renewable energy certificates (SRECs).
In addition to applying for incentives, you will need to fill out other paperwork like building permits during the solar panel installation process. These permits are specific to where you live. For example, certain states require that a roof has three feet of clear space surrounding the solar panels, whereas other areas of the U.S. will allow you to install panels across the entire surface of your roof. Your installer will know the restrictions and requirements of the states in which they operate, and can help you figure out which permits you need – in many cases, the installer will fill out this paperwork for you.
The time frame for this step is mainly dependent on how long it takes your installer to get it all finished and submitted. If you’re eager to get your panel system up and running immediately, just make sure to follow up with your installer to check on the progress of your paperwork.
3. Ordering equipment: choosing the panels and inverters and getting your installation scheduled

Now that you’re set up with the proper paperwork, your installer will be ready to place an equipment order through their primary distributor. At this point, you will have already decided on the equipment your system will include – that decision occurs before the contract sign that details the total costs.
However, if you’re looking for advice on equipment selection, here are some things you’ll need to consider. The two primary components you’ll need to evaluate for your clean energy system are solar panels and inverters. Your installer will likely recommend a particular brand for each, and will additionally offer a few alternatives. Durability, efficiency and aesthetics are the primary factors most homeowners will use to compare the various brands (other than price).
To be certain that you’ve chosen the right equipment for your system, spend some time researching microinverters vs. string inverters vs. power optimizers and look into the best-rated solar panels on the market. Evaluating your equipment options can help you feel prepared for the ordering and shipment stage of the installation process.
Once the equipment ordering process is complete, your property is added to your installer’s queue.Your equipment (panels and inverters) will likely arrive on the day of your installation, which can happen whenever your paperwork is approved (typically within one to two months). Time until install also depends on how many projects your installer has in their queue. If possible, try to get your solar installation done in the winter when solar companies aren’t as busy.
4. Solar installation: the big day
The actual installation is an exciting day for every solar homeowner who wants to rely on renewable energy as opposed to a utility company. There are several individual steps to the actual installation day:
- Your solar installer will start by prepping your roof and making sure the shingles or tiles are properly attached.
- Then, they put in electrical wiring that will connect your electrical panel and general power system.
- After the electrical wiring is complete, they will install racking to support your panels (this is the only piece of equipment that will actually be attached to your roof).
- Once the racking is level and safely attached, the panels are placed onto the racking.
- Finally, your inverter(s) are connected to the panels to convert direct current (DC) energy into the alternating current (AC) energy used in homes and on the electric grid.
The timeline for the installation will range from one to three days, completely dependent on the size of the system you are installing. One additional factor that can add time to your installation process is putting in a power meter for net metering. If your installer needs to add a power meter, this will add a few hours to your solar panel installation.
It’s important to note that a number of reputable solar companies go through these steps without issue, but less reputable installers may provide lackluster service and skip important steps in your install. This is why we rigorously vet our partners; the next and final stage of solar panel installation involves an inspection and final approval, which can reveal if your installer cut corners.
5. Approval and interconnection
The final step of going solar is “flipping the switch,” so to speak, and officially commencing to generate power from your rooftop. Before you can connect your solar panels to the electric grid, a representative from your town government will need to inspect the system and give approval. During this inspection, the representative will essentially be double-checking your installer’s work. He or she will verify that the electrical wiring was done correctly, the mounting was safely and sturdily attached, and the overall install meets standard electrical and roof setback codes.
Following this local inspection, you will be ready for official grid interconnection. A representative from your utility company will come by to do their own final evaluation of the solar panel system. As long as there are no glaring issues, your panels will go live the moment they “give the okay” and connect your system to the grid. You can expect to wait two weeks to a month for the town approval and utility approval to occur and interconnection to go live.
Commonly asked questions about solar panel installations
To better understand the installation process and how to install solar panels, check out a few of our answers to homeowners’ most frequently asked questions:
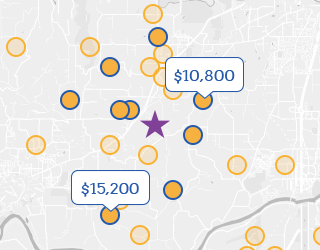
On average, solar panel installation costs range between $17,612 and $23,236. For more information, learn about how much the average solar panel installation costs in the U.S.
Yes, technically you can install a DIY solar panel system yourself. However, when it comes to installing a costly electrical system on your property, we recommend relying on the professionals who can help fill out permits, file important paperwork, and handle potentially dangerous electrical issues that may arise. Read our article to learn more about the pros and cons of DIY solar panels.
On average, it will typically take between one and three months before your solar panels are grid-connected and producing energy for your home.
First and foremost, it’s important to realize that no two solar installations are the same. While you can certainly do a cursory review of your own electrical system and roof, ultimately it will need to be evaluated by professionals to find the best solar energy setup. Knowing that, and that certain areas and situations require different equipment, can help you make informed decisions about your solar energy service and needs.
Install solar panels now and start saving money
Why go through the one to three-month process of installing solar on your home? Nowadays, the average solar shopper on EnergySage offsets approximately 95% of their electricity usage by going solar, and will pay off their solar energy system in just under 8 years. Find out just how much you can save by using our Solar Calculator to get a personalized instant estimate based on offers in your area. If you’re ready to start comparing quotes from pre-screened installers in your area, you can register your property on the EnergySage Solar Marketplace.