

Once solar panels are set up on a property, they’ve relatively maintenance free. This is because the majority of solar panel systems have no moving parts; as long as they’re receiving sunlight and the products aren’t faulty, they will be a reliable source of electricity for at least 25 to 30 years.
Because of their ease of use, most people don’t think about the actual setup of a solar panel system. What parts are required? And how do they all connect to produce power for your property? Here’s a quick intro to the most important solar system components, and how they’re set up on your home or business.
Key takeaways
- Solar panel systems include a few key components: a solar array, racking and mounting equipment, inverters, a disconnect switch, and, optionally, a solar battery.
- While you may be tempted to DIY your solar system, it’s generally easiest and safest to hire a professional installer.
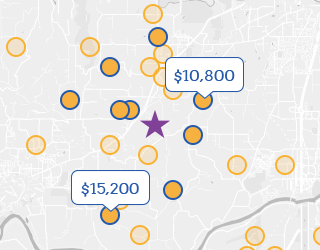
- Check out the EnergySage Marketplace to compare quotes for solar panel systems from our network of pre-vetted installers.
What’s in the setup of a solar panel system? What components do you need?
There are a few key components required for a solar panel system:
Solar array
The most important piece of your solar panel system will be the solar array itself. You want your solar panels placed in a sunny spot on your property. The panels should be facing south for optimal energy production. Panels can also face east or west and produce a good amount of electricity, so long as the area is clear of shade.
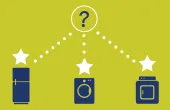
When it comes to solar panels, you have multiple options regarding the type of panel (monocrystalline, polycrystalline, thin-film) and the manufacturer. The solar panel technology you choose should depend on the type of installation and your preference. For example, if you’re installing a ground mounted system then you probably have a good amount of land available. This means you have the space to install more standard efficiency panels and spend less upfront. If you’re installing on a roof with restricted amounts of space available for solar panels, then high-efficiency, monocrystalline panels – like those from SunPower, LG, or REC – can help produce more electricity to maximize your savings. Many solar shoppers will choose high-efficiency panels even if they don’t require them because they prefer to install fewer panels overall.
Racking and mounting equipment
Your solar array will be affixed to your property using racking and mounting systems.

Rooftop solar panel systems will have a fixed mount system, which will keep the panels stationary on your roof. All rooftop mounting systems serve the same functional purpose, but can differ on how they’re installed. Most racking is standard “penetrating” rooftop racking, which means there will be holes drilled into your roof to fasten the mounting system. Installers will use sealants at the site of penetration to prevent roof leaks (and should provide a warranty for that as well). But, this type of roof mount may not be the best for your property depending on the material of your roof. If you have a metal, clay or Spanish tile roof, installers may recommend racking systems that do not require roof penetration (such as Quick Mount PV or Ecofasten).
With ground mounted installations, there are also fixed mount systems. Some people may choose to use track mounts, or “trackers,” which will allow the panels in the solar array to follow the sun as it moves across the sky. The downsides of using trackers are that they tend to be expensive upfront and can require more maintenance over time. But, the benefit of installing them is that solar panels mounted on a tracking system will produce more electricity than if they were stationary.
Inverters
Your solar panel setup will also have an inverter (or multiple) that will be connected through wiring to the panels. The purpose of an inverter is to convert the direct current (DC) electricity formed at the panel site to alternating current (AC) for your home’s appliances to use.
There are three main types of inverter technologies available, including string, power optimizers, and microinverters. One inverter solution may be more suitable than the other depending on how your solar array is set up. String inverters, the original technology, will have the advantage of being the most cost-competitive option. But, power optimizers and microinverters are better for more complicated installations, such as those with panels facing multiple directions or panels that experience marginal shading. This is because they are module-level performance electronics (MLPEs). MLPE technology enables a solar panel system to produce efficiently as a whole even if one or a few panels are out of commission.
If you go with a microinverter solution, the inverters will be at the panel site. If you install a power optimizer or a string system, your inverter will be at the ground level. Historically, inverters have been placed both inside and outside of buildings. These days, it is more common to have an inverter on the outside of building so that servicing is easier (if required). In addition, some local towns or fire codes may require that the inverter be placed outside. If you’d prefer the inverter to be on the inside of your home for aesthetic reasons, it’s best to check with your installer to see if this is possible. Local installers should be aware of your town’s building and electrical codes that may impact your installation options.
In addition to being connected to your solar panels, your inverter is also connected to your existing electrical system through your breaker box. In some cases, electric panels will need upgrades prior to installing solar because of the increase in amperage of energy running through your home.
Disconnect switch

Solar panel setups should also have a disconnect switch that will turn off the solar panel system. In fact, many solar panel systems have two disconnect switches: a DC disconnect (which disconnects the DC current between the solar panels and the inverter) and the AC disconnect (which will disconnect your inverter from the grid with grid-tied systems). Though most disconnect switches aren’t commonly used in the lifetime of a solar panel system, it’s necessary in most states for safety reasons. Professional installers will use the disconnect switch should they need to turn the system off to do repairs or maintenance.
Solar battery (optional)
Batteries are becoming increasingly popular to install with solar panel systems. Many property owners use batteries in grid-tied systems for providing back up power or for mitigating time-of-use (TOU) charges. Others elect to use batteries for the purpose of going off-grid.
Where a solar battery lies within your solar panel setup will depend on the type of battery. Some batteries will need to be connected on the DC-side of your system. With these batteries, the solar energy runs to the battery before conversion at the inverter. There are also batteries that are connected to the AC-side of the systems, post-inverter in the energy flow.
Batteries are certainly becoming a more popular component to a solar panel system, but they’re certainly not a requirement. If you’re installing a grid-tied system, rarely experience power outages, have a favorable net metering policy and don’t deal with time-variant electricity pricing, then purchasing a solar battery isn’t going to make economic sense. You can always talk to an installer about designing setting up your solar panel system so it’s ideal for a battery addition at a later date if it’s something you may consider in the future.
Should you DIY your solar setup?
As you can see, there are many different components in a functional solar panel setup (and this isn’t even all of them.) With most solar projects, you’ll want to get a professional installation company to do the work. While you may be able to save on labor costs with do-it-yourself (DIY) solar projects, hiring a professional installer will be the easiest and safest way to go. Outside of performing the labor for the install, solar contractors will also file for permits and interconnection applications that you need to get the system up and running. This will save you a lot of time and energy.
Most important: find a professional installer
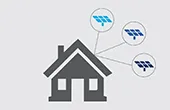
You can get multiple solar quotes (including equipment, labor, and permitting) by using EnergySage Solar Marketplace – all for free, and completely online. Installers that provide quotes on EnergySage have been pre-screened and vetted to ensure that they’re experienced and reputable. If you’d like to learn more about the optimal solar panel setup for your property, you can ask installers to provide a system design image with their quote, or chat with them about their recommendations for positioning and equipment.